

A New RIAA Preamp for My BeoGram 4002
Second SMD prototype of my custom RIAA preamp for the BeoGram 4002 is now built and tested. A dual-stage OPA2134 design focused on low noise, accurate RIAA equalization, and clean integration, with measurements and further refinements coming next.
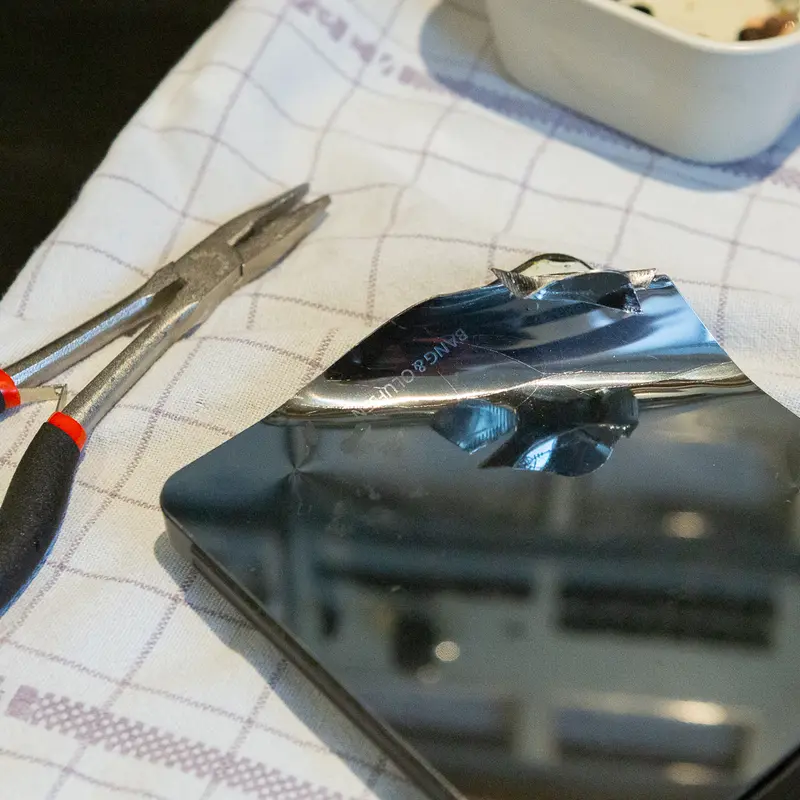
Bringing back the shine: Replacing the top-plate on the BeoLink 7000
After restoring quite a few Beolink 7000 units over the years, I’ve noticed a recurring issue. The top plate (#9001) is almost always scratched or dented. It’s the first thing you see and touch, and unfortunately, it's the first part to show its age.
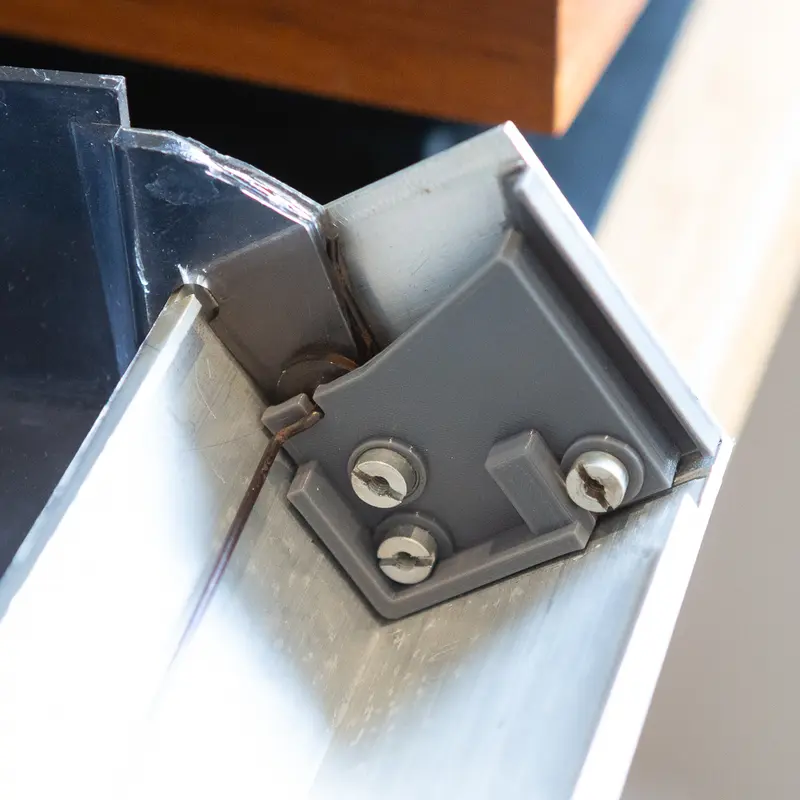
New mounting brackets for the BeoGram 3000
After encountering broken plastic mounting brackets on my BeoGram 3000, I created a 3D model and printed replacements in grey PLA. To ensure long-term durability, I had them made from polypropylene.

Securing the glass front of the BeoLink 7000
There are instances where the adhesive securing the plastic frame to the glass front begins to fail. If the adhesive has not completely detached, it can be repaired using super glue and a syringe.
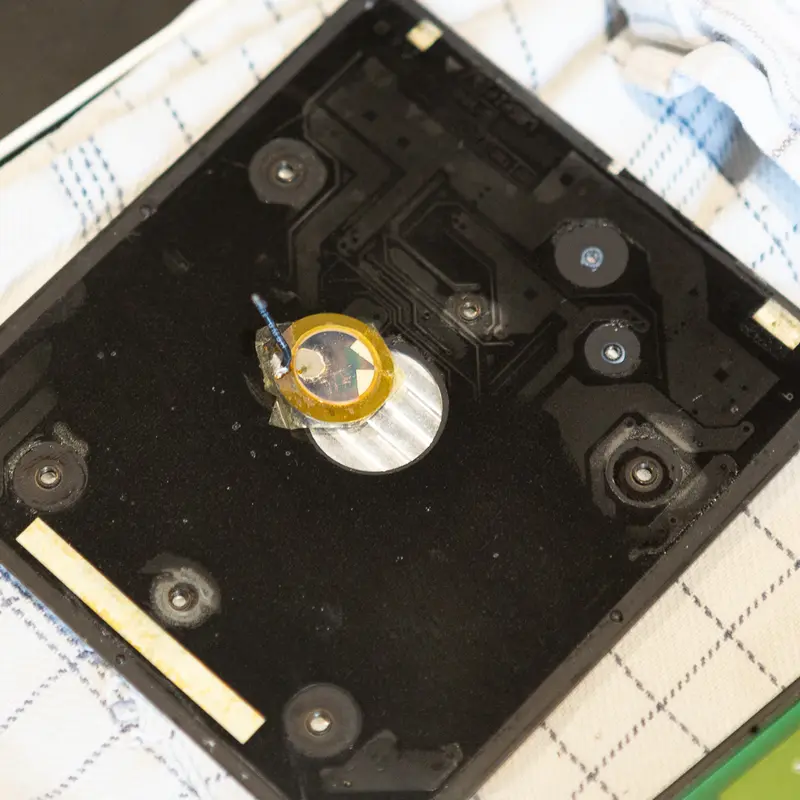
Replacing the piezoelectric element on a BL7000
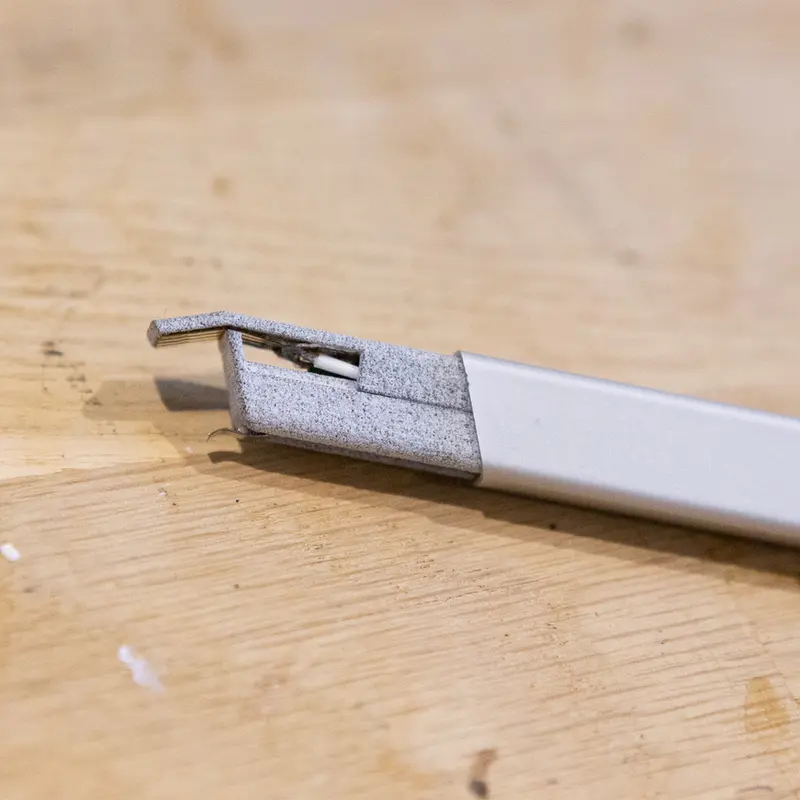
An excellent feature of the BeoLink 7000 is that tapping the top plate (#9001) awakens the device. However, this feature can sometimes fail due to the natural degradation of the piezoelectric element responsible for detecting the tap.
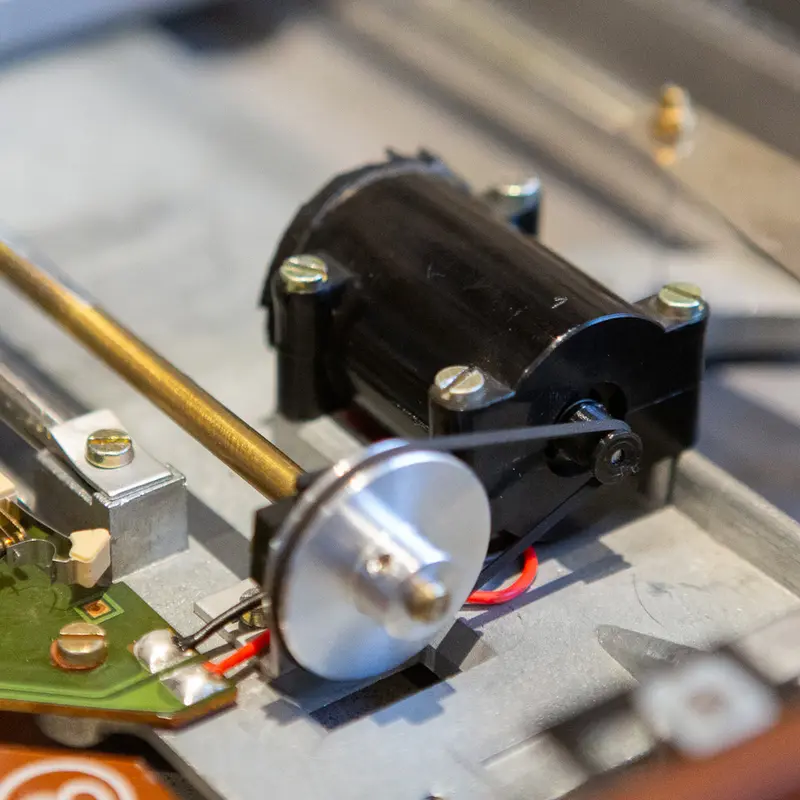
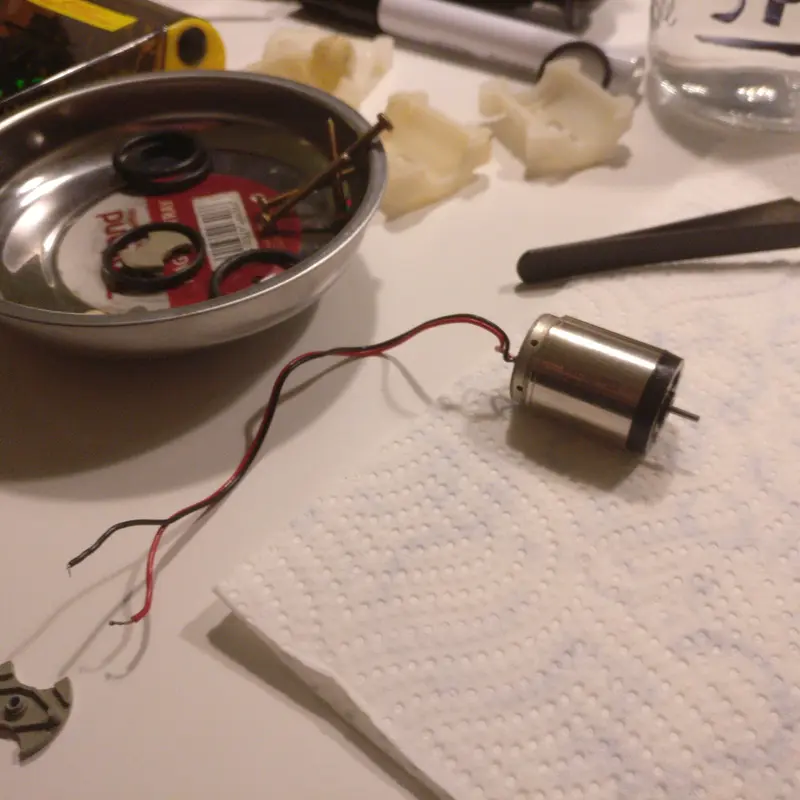
Replacement Sledge Motor for the BeoGram 4000
With some help back in 2021, I found two possible replacement sledge motors for the BeoGram 4002 — one from Maxon and one from Portescap, where the latter is the cheapest option (50 USD versus 75 USD).I bought the motor from Portescap and did some...
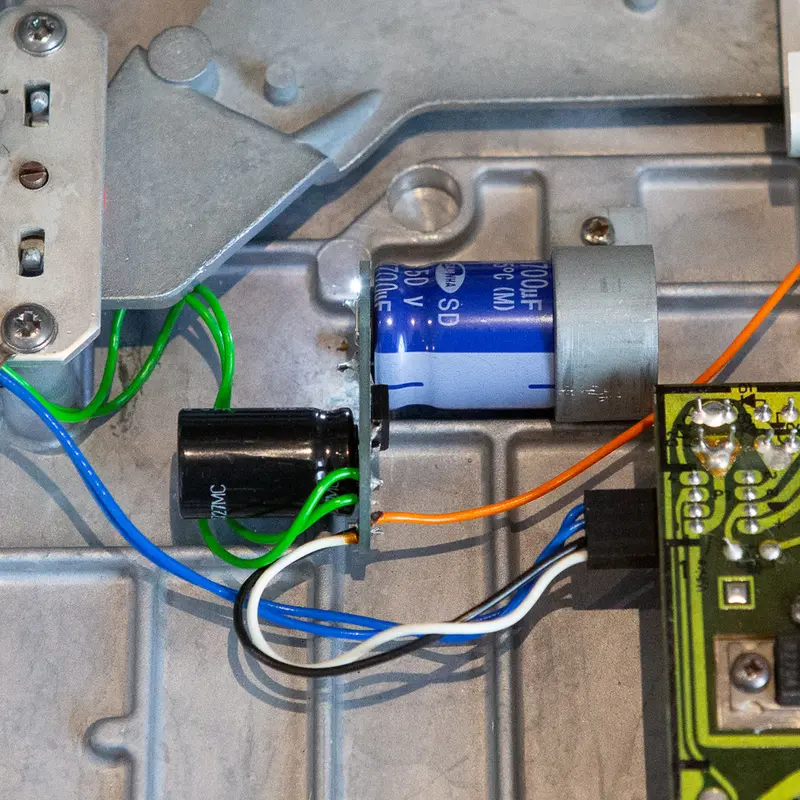
BG4002 PCB adapter for reservoir capacitors
I am currently restoring a BeoGram 4002 type 5513, and even though the reservoir capacitors usually are within specifications, I replace them to avoid impending issues. The setup in the 5513 is relatively unique since it consists of a dual capacitor with...
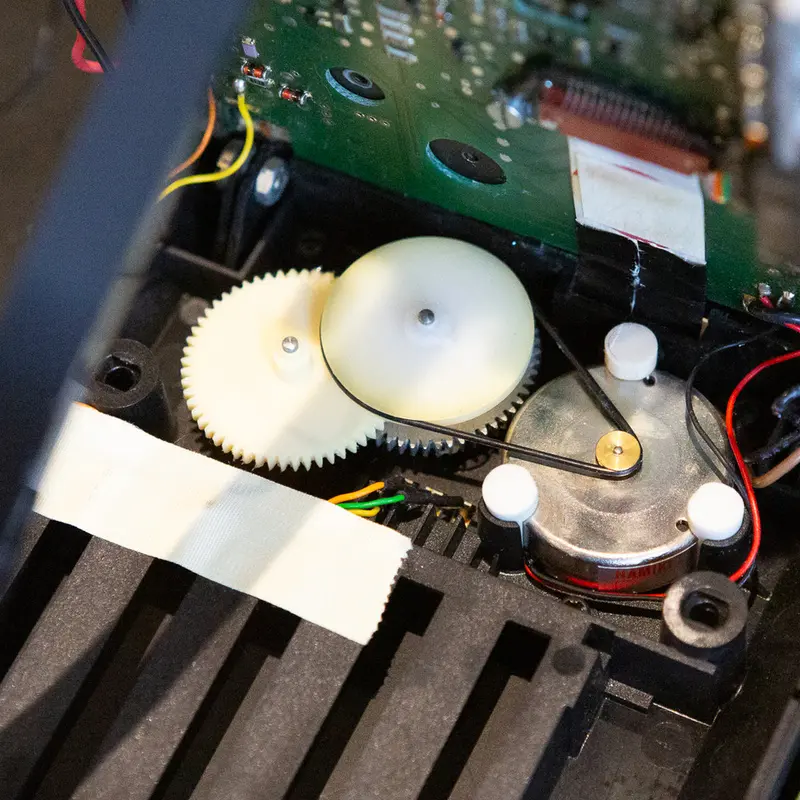
Cleaning and lubricating the BeoLink 7000
Even though the manual states that the need for lubrication is negligible, it is always best practice to clean and lubricate the mechanical components to reduce wear and tear. Lubrication allows the parts to remain in an optimal operational state for an extended period. Since I encountered issues with a Beolink 7000 where the panel remained stationary despite the motor (9017) running, I decided to investigate it. This post mainly focuses on the mentioned problems but will also cover which passive components to replace on PCB01.
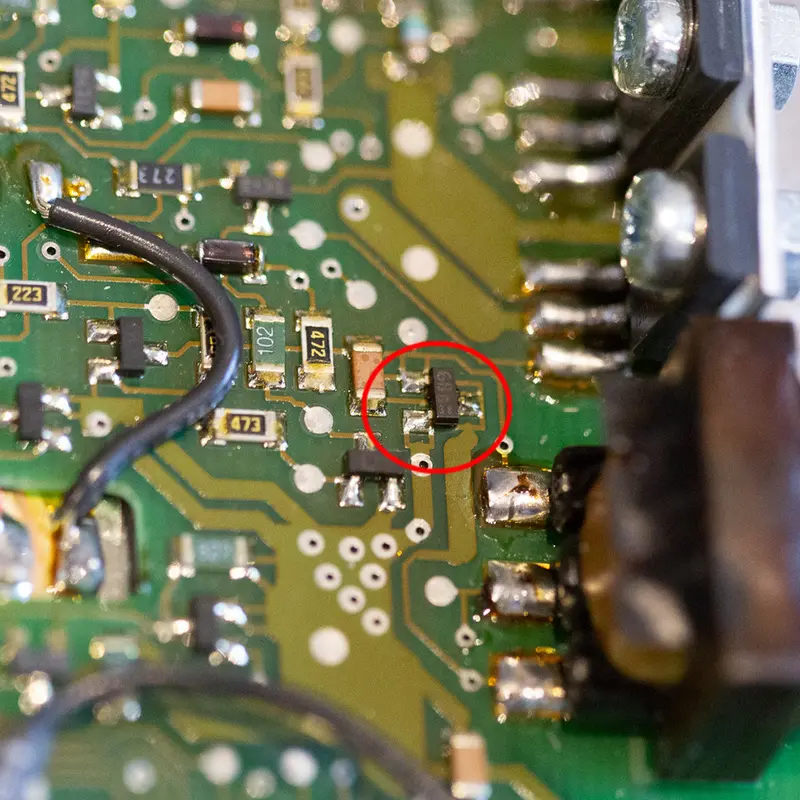
Troubleshooting a Beolink 7000 with faulty backlight
I encountered another Beolink 7000 with the typical backlight failure, necessitating the replacement of the electroluminescent (EL) foil. However, this replacement did not resolve the issue. Subsequent measurement of the AC voltage supplied to the...
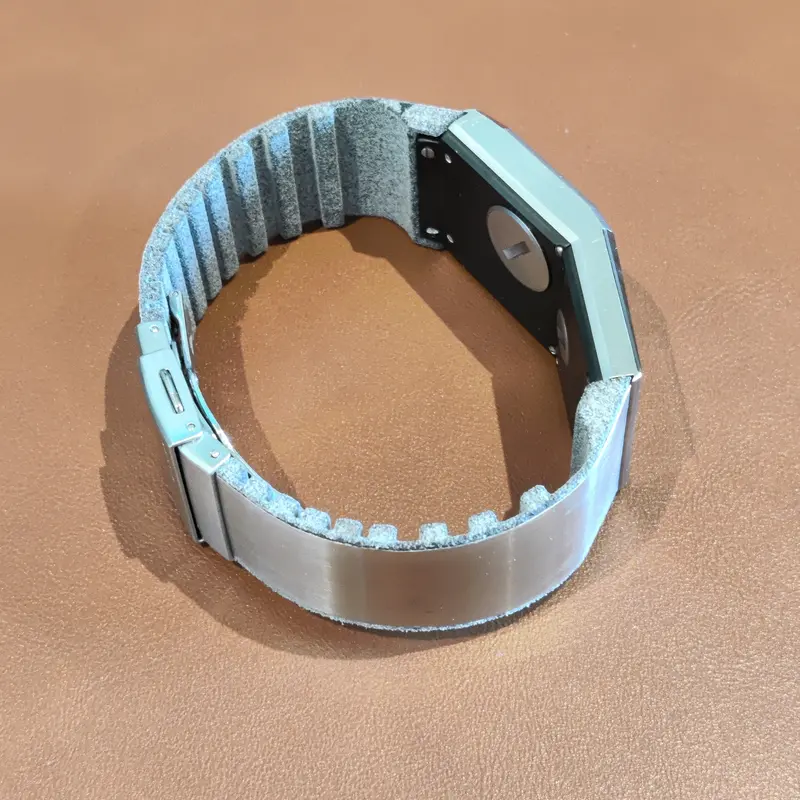
Reviving Your BeoWatch with TPU
Every BeoWatch owner knows the frustration of having to deal with the fragility of the original plastic parts in the strap. These parts are prone to tear and can spoil the otherwise luxurious experience of owning a BeoWatch. I have designed and created a...
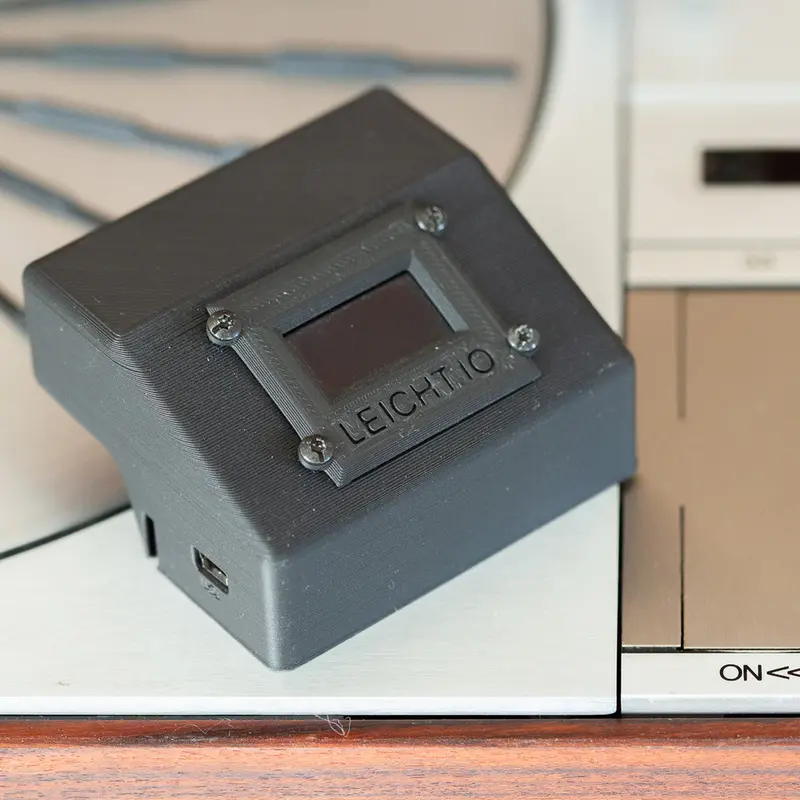
Testing the BeoLink 7000
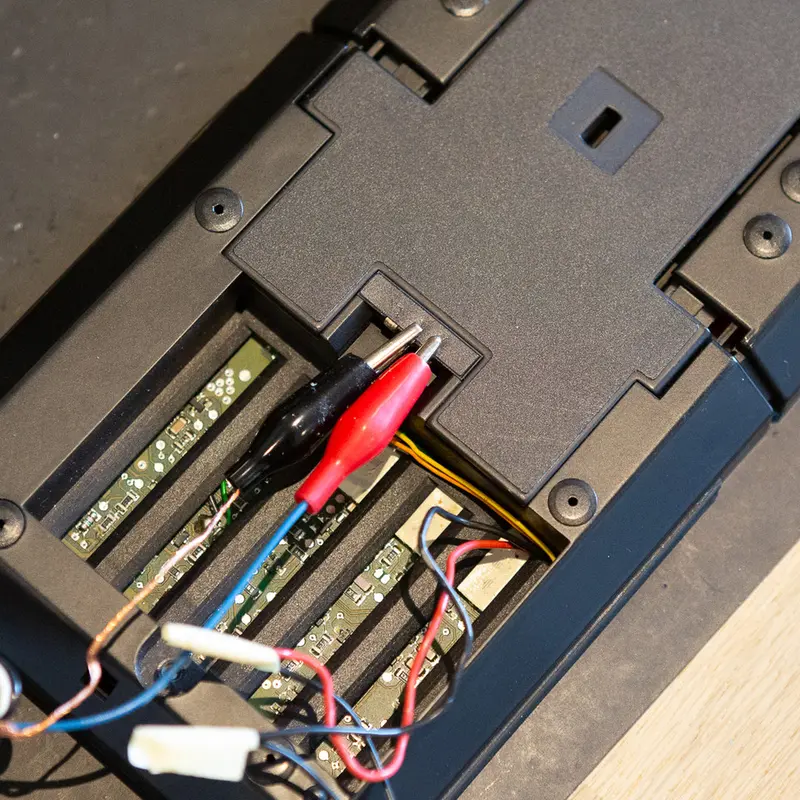
After replacing the backlight and restoring the BeoLink 7000 it is important to verify that the remote works as expected. Funny enough B&O has made this possible in a rather funny but easy way. By adding a 10Hz signal with a maximum amplitude of 5V...
Replacing the CMOS battery on the BeoLink 7000
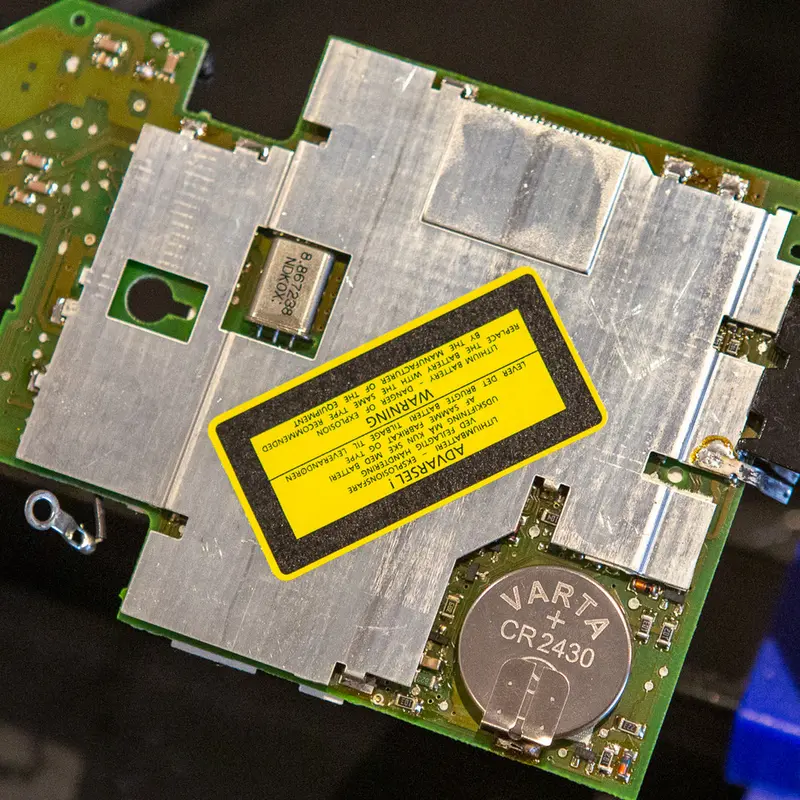
An essential part of the restoration process of the BeoLink 7000 is to replace the CMOS battery. The CMOS battery ensures that the processor preserves its configuration, should the main battery run out of power.
Replacing the broken pickup mount on the Beogram 4000
Unfortunately, the plastic tab in the pickup mount on the Beogram 4000 series can break due to wear, stress and age as seen below. To address this problem I’ve developed a replacement with flexible PCB and plastic mount. To ensure that the parts are as...
Adjusting the speed on a Beogram 6500
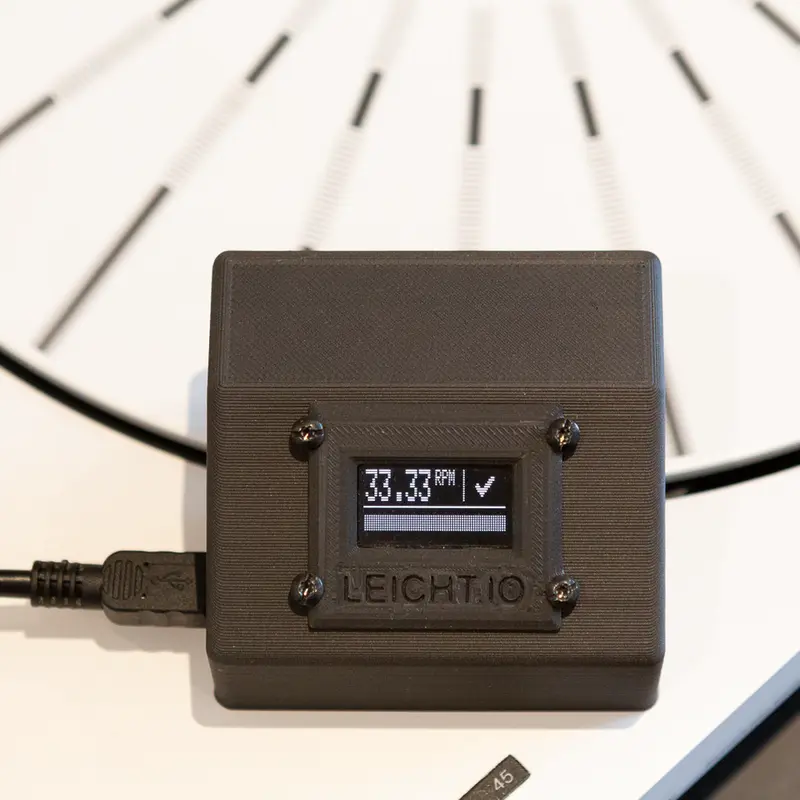
After replacing the capacitors, changing the belts and lubricating the mechanical parts it is crucial to measure and verify that the performance is as expected. I usually do this over a prolonged period using the BeoTac. Initial measurements revealed that...
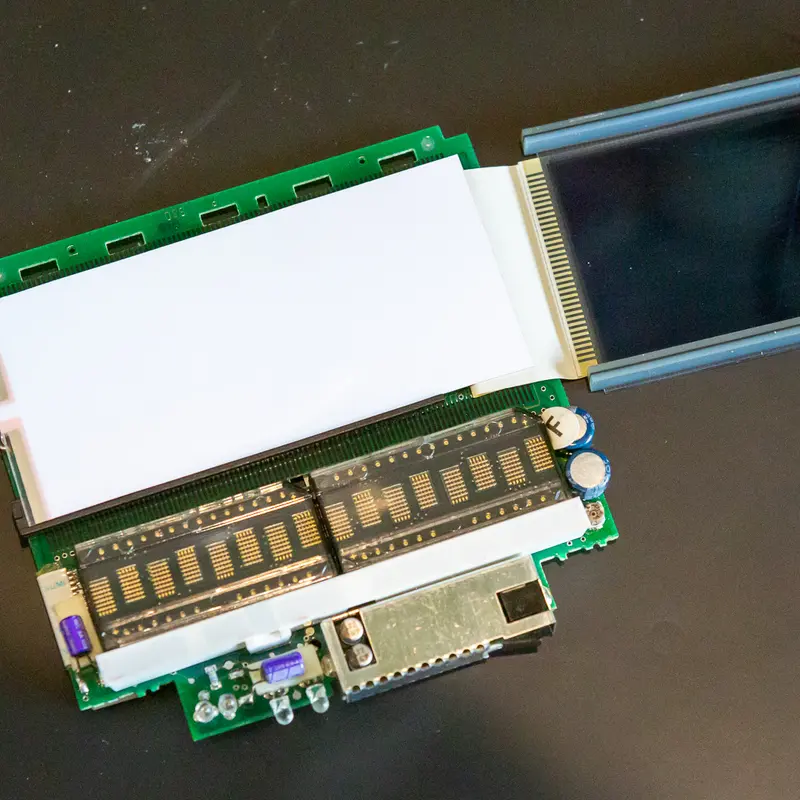
Replacing the backlight on a BeoLink 7000
A common issue on the BeoLink 7000 is weak or absent backlight as seen in the picture below.The backlight in the BeoLink display comes from a white Electroluminescent Backlight Foil (EL Foil) that is placed behind a blue-transparent LCD. It has a typical...
Updates to BeoTac
One of the important matters when 3D printing is to minimize the print time, so I've optimized the layout of the BeoTac which reduces the print time by ~45 minutes. The result is a good looking BeoTac with softer edges.You can see the previous design...
Servo motor replacement for the Beogram 4000 series
The servo motor in the Beogram 4000 series isn't as prone to wear as the DC platter motor but occasionally I come across some noisy and unstable ones. They are hard to restore since it's impossible to take the Oilite bearings out. They are fused...
Restoring the Beogram 7000 - Adjusting the turntable
My previous post covered how to change the necessary electronic components in the Beogram 7000. Naturally, the next step is to adjust the turntable and relubricate it which this article will cover.Adjustments and other common issuesI always adjust the...
Restoring the Beogram 7000 - Changing the electronic components
Produced from 1992 to 1996 the Beogram 7000 was the last in the line of high-end turntables from Bang & Olufsen before the CD took over. It is automatic and remote controllable via the Beolink 7000 or Beolink 5000 and considered the Holy Grail of...

BeoTac, a tachometer for the Beogram 4000 series
This article aims at describing the process of developing and implementing an Arduino-based tachometer. This should make it possible to measure the performance and stability of the motor in a Beogram 4000 series turntable.
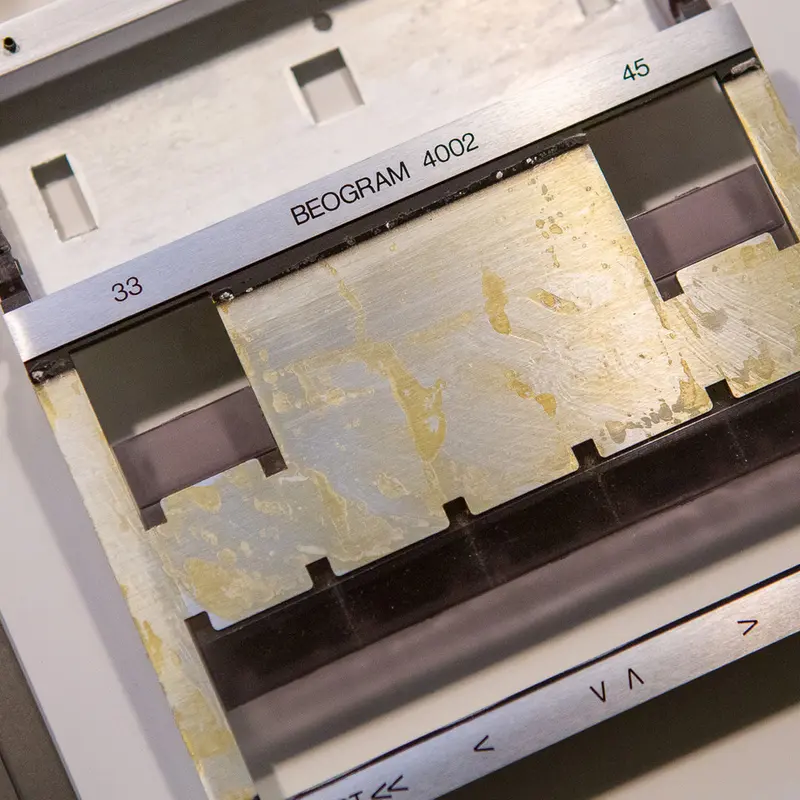
Restoring the keypad and chassis on a Beogram 4002
After replacing the light bulbs on the Beogram 4002 I wrote about in my previous post it was time to restore the keypad and chassis. As almost always, the varnish and black paint are worn by decades of use since the acids in the skin dissolve it. As...
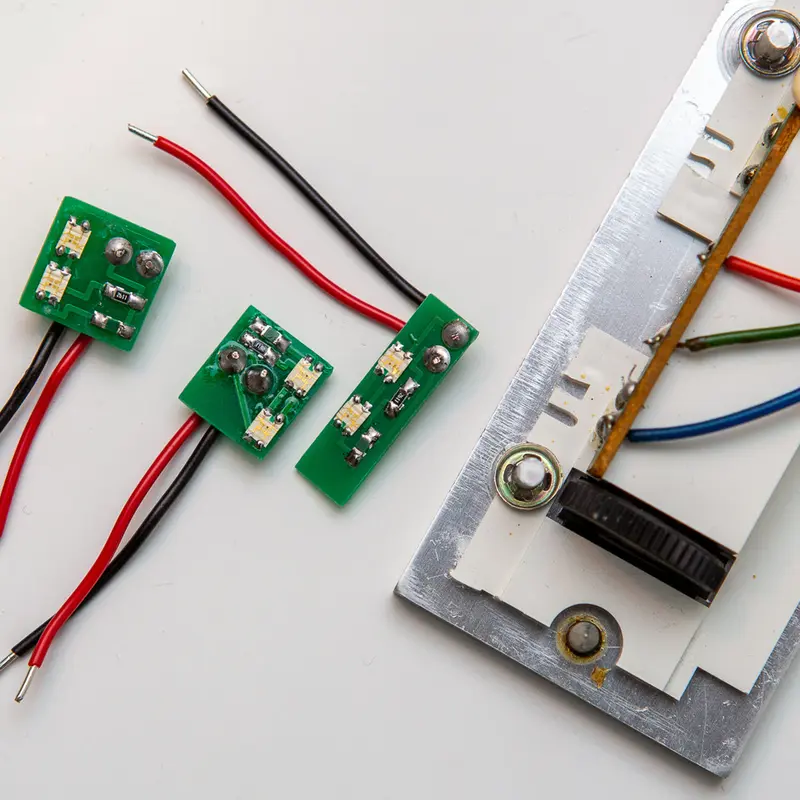
Replacing the incandescent light bulbs
This article shows the results of experimenting with a plug-and-play replacement for the old incandescent light bulbs originally placed in the RPM adjustment part of the keypad on the Beogram 4000 series.

Replacing the light bulb tracking sensor on the BG4002
As usual, when repairing the Beogram 4002, I replace the light bulb associated with the tracking sensor. The old light bulb is old and prone to failure. Furthermore, it's glued to the housing and, therefore, hard to replace. To make sure that...
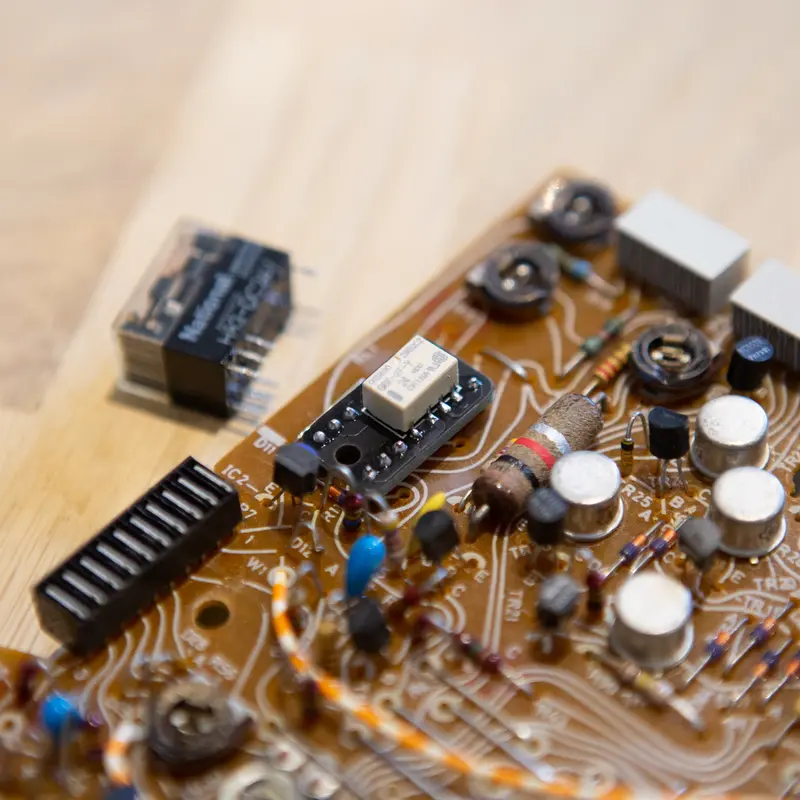
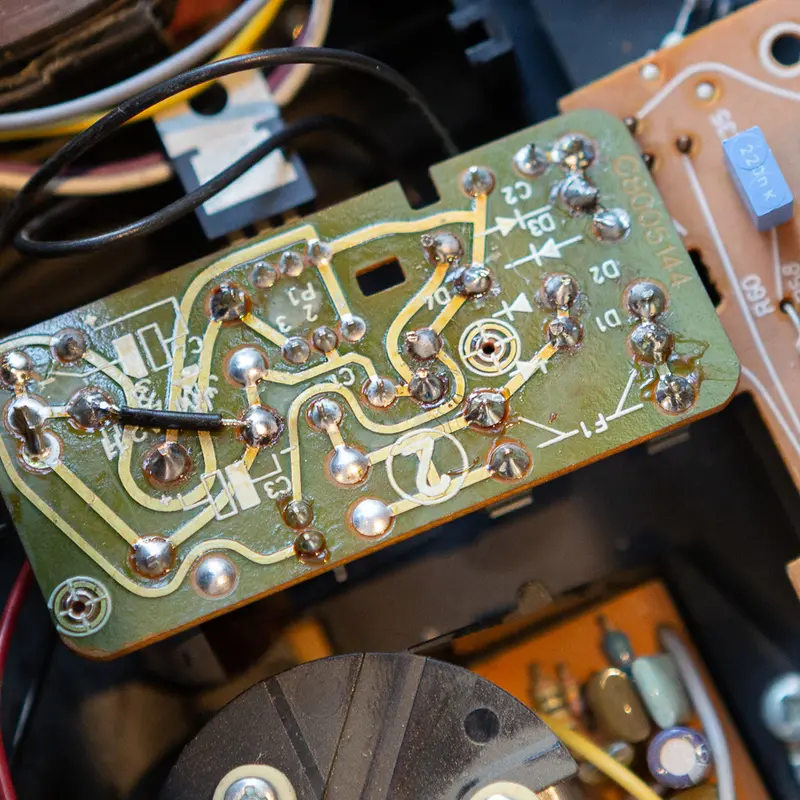
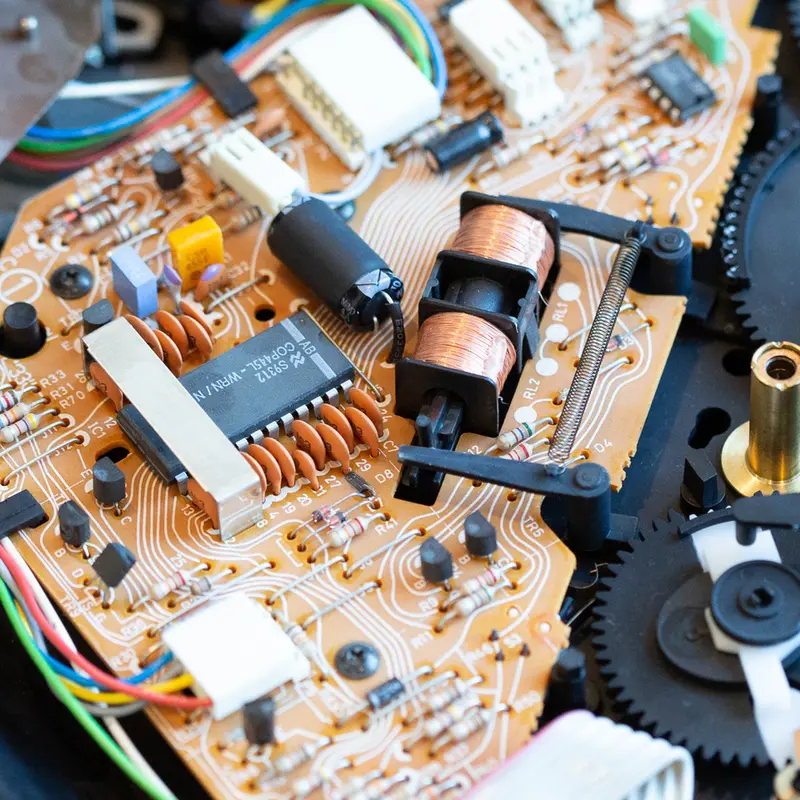
Beogram 400X Relay Replacements
After I changed all the capacitors on the main board of the Beogram 4002 (5521), I am restoring it right now, the 45 RPM circuit stopped working while listening to a record with The Boss. I sought help with the schematics and replaced the two main ones.